

For Halloween a couple years ago I went as my favorite Disney Princess! This costume did not quite turn out how I had anticipated. It actually ended up being several inches shorter than the picture on the pattern claimed it would be and I hopefully will soon be adding more to it so I don't feel quite as conscious wearing it!
Note: While this is a tutorial, it's also mostly a scathing pattern review and if at all possible, I recommend using a different pattern than I did.An adorable pic of Rapunzel for your inspiration:

I do not own this image.
Dress

(Not quite how the picture on the pattern looked...)
I made the costume from the pattern shown below, but I have recommendations to fix the issues I had.

(This pattern is actually the devil)
Fabric: Purple satins in the shades you so desire. I went a little darker than is movie accurate, but I really like the color! You can still tell who I am.
Alterations: Oh dear god so many
Alterations: Oh dear god so many
First of all, the length. According to the picture, it appears that A is too long for my purposes, so I went with B (upper left), which looks like it should be tea length. False. It is ridiculously short as evidenced in any and all of my pictures. By the time I realized how short I was making my skirt, it was too late.
Next, be aware that this pattern is open in the front. So that's a thing. It's fine for the top because I laced it up using purple ribbon. On the skirt I simply ran out of time before Halloween and I simply safety pinned it shut for the evening. Not the greatest solution, but it worked.So now that I've ranted about the deceit of this pattern, go ahead and make it using view A to their specifications.
Now the sleeves. As you can see, the pattern does not call for sleeves at all, so I added my own.

(Puffed to perfection)
In order to add these, I looked up a puffed sleeve tutorial online and made them longer than anticipated and hemmed them up. By hemmed I mean that if you look closely at the picture you can see where it's still pinned up because I was in crunch time. I sewed on ribbons for the stripes. Make sure you measure the arm hole so as to have enough fabric to go around after gathering the top of the sleeve. Puffed sleeves are not too awful to make, but winging them and trying to get them to fit your pattern is more difficult. If you can, find a pattern that has sleeves.
In order to get the dress to close and to add the lacing, you need to add rivets.

(Make sure they're relatively close together!)
I pounded in 12 rivets per side to make sure it would close appropriately and then laced it up using a pretty purple ribbon, matching that on the sleeves.
Hair and Accessories
The hair is the really tricky part. I went with what would be the braid she wears in the kingdom if it were about a tenth of the thickness. I really lucked up because my mom and I have the exact same hair color and for some reason she had a fake braid that she used to wear. I braided my already semi long hair, attached the fake braid, wove in some more purple ribbon and some flowers and I was set to go!

(A weird picture, but you can see the braid)
Get yourself a crown and keep Eugene from stealing it from you!
A fry pan is an absolute must.
I already had a stuffed Pascal because my roommate is the best, so I pinned it to my shoulder. Not necessary, but it's a cute touch.
All Done!

(Full costume shot. With fry pan.)
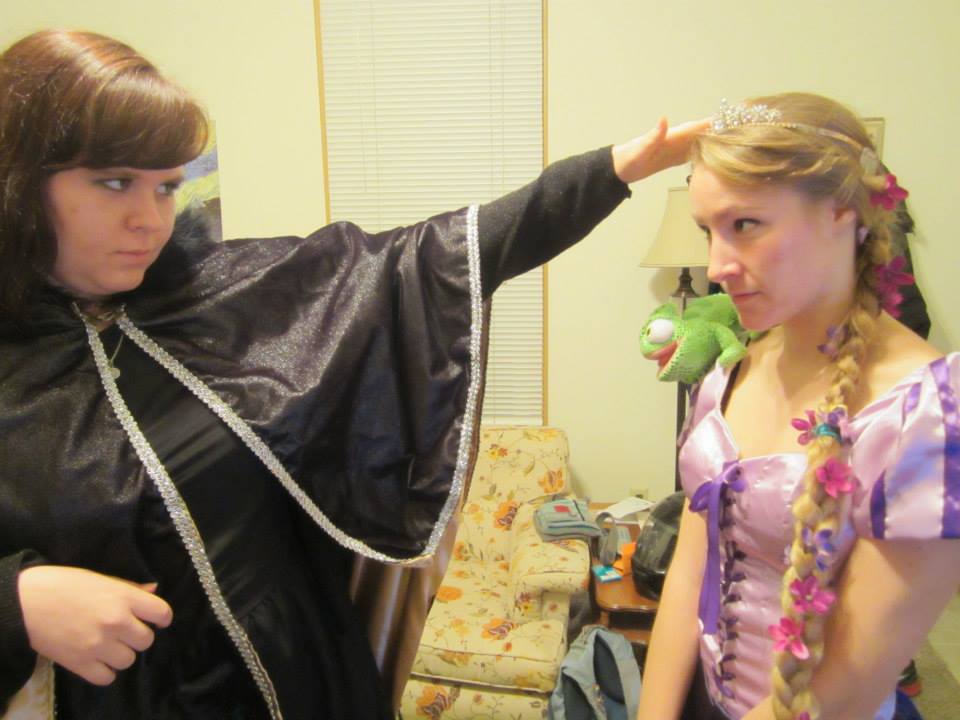
(Mother knows best...)

(Rapunzel and Eugene Fitzherbert)
No comments:
Post a Comment